Archives August 2024

How do I change the spark plugs on my Bullnose F-150?

Bullnose Bill Answers Ford Truck Questions

Changing the spark plugs on your 1985 Ford F150 is a relatively simple maintenance task that can keep your engine running smoothly. Here’s a step-by-step guide to help you through the process:

Tools and Materials Needed:

Torque wrench (optional but recommended)

  • New spark plugs (make sure they are gapped correctly for your engine)
  • Spark plug socket
  • Ratchet and extension
  • Spark plug gap tool
  • Anti-seize compound (optional)
  • Dielectric grease (optional)
Instructions:
  1. Preparation:
    • Make sure the engine is cool before you start working on it.
    • Disconnect the negative battery terminal to avoid any accidental electrical discharge.
  2. Locate the Spark Plugs:
    • On your 1985 Ford F150, the spark plugs are located on the sides of the engine block. Depending on your engine model, there should be either 6 or 8 spark plugs.
  3. Remove the Spark Plug Wires:
    • Gently twist and pull the spark plug wire boot off the first spark plug. Do this one at a time to avoid mixing up the wires.
    • You might want to label the wires or take a photo to ensure you reconnect them correctly.
  4. Remove the Old Spark Plug:
    • Use the spark plug socket and ratchet with an extension to remove the old spark plug. Turn counterclockwise to loosen and remove it.
    • If the spark plug is difficult to remove, you can use a little penetrating oil and let it sit for a few minutes.
  5. Check the Gap on the New Spark Plug:
    • Use the spark plug gap tool to check the gap on the new spark plug. Refer to your vehicle’s manual for the correct gap specification.
    • Adjust the gap as necessary using the gap tool.
  6. Install the New Spark Plug:
    • Apply a small amount of anti-seize compound to the threads of the new spark plug (optional).
    • Carefully thread the new spark plug into the engine by hand to avoid cross-threading. Once it’s snug, use the spark plug socket and ratchet to tighten it. Be careful not to overtighten; a torque wrench can help you achieve the correct torque specification.
  7. Reattach the Spark Plug Wire:
    • Apply a small amount of dielectric grease to the inside of the spark plug boot (optional).
    • Push the spark plug wire boot onto the new spark plug until you feel it click into place.
  8. Repeat for Each Spark Plug:
    • Repeat steps 3-7 for each spark plug, working one at a time to ensure the wires are not mixed up.
  9. Reconnect the Battery:
    • Once all the spark plugs have been replaced, reconnect the negative battery terminal.
  10. Test the Engine:
    • Start the engine to ensure it’s running smoothly. If you notice any issues, double-check the spark plug connections and gaps.

And that’s it! You’ve successfully changed the spark plugs on your 1985 Ford F150. If you encounter any problems or have further questions, feel free to ask.


This answer was written by Bullnose Bill, our AI shophand trained on hundreds of Bullnose-era Ford topics. He knows his way around old Ford Trucks.

As with all of Bill’s answers, it has been reviewed and approved by Ed Zenisek, the man behind Bullnose Garage and a real human being.

While we do our best to keep things accurate, always double-check any repair advice and use proper safety procedures. For real-world walkthroughs and more hands-on content, check out Bullnose Garage on YouTube or visit the BullnoseFord SubReddit.


As an Amazon Associate, I earn from qualifying purchases. If you see an Amazon link on my site, purchasing the item from Amazon using that link helps out the Channel.
I need to replace the wiper motor on my F-150.

Can you give me instructions?

Bullnose Bill Answers Ford Truck Questions

Absolutely, replacing the wiper motor on a 1985 Ford F150 is a straightforward task if you follow these steps:

Tools and Materials Needed:

Safety glasses and gloves

New wiper motor

Socket set

Screwdriver set

Pliers

Penetrating oil (optional)

Instructions:
  1. Disconnect the Battery:
    • Always start by disconnecting the negative terminal of your battery to ensure safety while working on the electrical components.
  2. Remove the Wiper Arms:
    • Lift the wiper arms away from the windshield.
    • Use a small screwdriver to lift the tab at the base of each wiper arm, then carefully wiggle and remove the arms.
  3. Access the Wiper Motor:
    • Open the hood and locate the wiper motor on the firewall. It’s typically on the driver’s side.
  4. Remove the Cowl Panel:
    • Remove any screws or bolts securing the cowl panel (the panel just below the windshield).
    • Carefully lift off the cowl panel to expose the wiper motor and linkage.
  5. Disconnect the Wiper Linkage:
    • Use pliers or a small pry tool to disconnect the wiper linkage from the motor. Be careful not to damage the linkage or the motor arm.
  6. Remove the Wiper Motor:
    • Unplug the electrical connector from the wiper motor.
    • Remove the bolts or screws securing the motor to the firewall.
    • Carefully remove the motor from its mounting position.
  7. Install the New Wiper Motor:
    • Position the new wiper motor in place and secure it with bolts or screws.
    • Connect the electrical connector to the new motor.
  8. Reconnect the Wiper Linkage:
    • Reattach the wiper linkage to the motor arm. Make sure it’s securely connected.
  9. Reinstall the Cowl Panel:
    • Place the cowl panel back in position and secure it with screws or bolts.
  10. Reattach the Wiper Arms:
    • Place the wiper arms back onto their respective posts and ensure they’re securely attached.
  11. Reconnect the Battery:
    • Reconnect the negative terminal of your battery.
  12. Test the Wipers:
    • Turn on your ignition and test the wipers to ensure they’re functioning properly.

And that’s it! You should now have a fully functional wiper motor on your 1985 Ford F150. If you have any other questions or run into any issues, feel free to ask.


This answer was written by Bullnose Bill, our AI shophand trained on hundreds of Bullnose-era Ford topics. He knows his way around old Ford Trucks.

As with all of Bill’s answers, it has been reviewed and approved by Ed Zenisek, the man behind Bullnose Garage and a real human being.

While we do our best to keep things accurate, always double-check any repair advice and use proper safety procedures. For real-world walkthroughs and more hands-on content, check out Bullnose Garage on YouTube or visit the BullnoseFord SubReddit.


As an Amazon Associate, I earn from qualifying purchases. If you see an Amazon link on my site, purchasing the item from Amazon using that link helps out the Channel.

My windshield washers aren’t working on either side. What can I do?

Bullnose Bill Answers Ford Truck Questions

Ah, the classic windshield washer conundrum! First, let’s get to the basics. Here’s a quick checklist to troubleshoot:

  1. Check the Washer Fluid Level: Make sure you have fluid in the reservoir. You don’t want to find out it’s empty after a long drive!
  2. Inspect the Pump: Listen for a humming sound when you activate the washer. If you hear nothing, the pump might be shot or disconnected. Give it a tap; sometimes it just needs a little encouragement!
  3. Check the Fuses: Look in your fuse box for the washer pump fuse. If it’s blown, replace it and see if that does the trick.
  4. Examine the Hoses: Check for any kinks or leaks in the hoses that connect the pump to the nozzles. If a hose is cracked, it might need replacing.
  5. Clear the Nozzles: Sometimes, the nozzles can get clogged. Try using a needle or a pin to clear any debris.
  6. Test the Switch: If all else fails, the switch on your steering column might be faulty. A multimeter can help you diagnose that.

If you go through these steps and still have issues, feel free to reach out for more help. Just remember, if at first you don’t succeed, Google is your friend!

If I need to replace the washer pump, how do I do that?

Replacing the washer pump on your Ford F150, Bronco, or Van from 1980 to 1985 is a pretty straightforward task. Here’s a step-by-step guide to get you through it:

Tools and Materials Needed:
  • New washer pump (make sure it’s compatible with your vehicle)
  • Screwdriver (flathead and Phillips)
  • Pliers
  • Bucket or towel (to catch any spilled fluid)
  • Safety glasses and gloves (always a good idea!)
Steps to Replace the Washer Pump:
  1. Disconnect the Battery: Safety first! Disconnect the negative terminal to avoid any electrical issues while you’re working.
  2. Locate the Washer Pump: The washer pump is typically found on or near the windshield washer fluid reservoir. It’s usually a small cylindrical unit with a couple of hoses connected to it.
  3. Remove the Fluid Reservoir (if necessary): In some cases, you may need to remove the fluid reservoir to access the pump. Unscrew any mounting screws and carefully lift it out. Have that bucket or towel handy!
  4. Disconnect the Hoses: Use pliers to gently squeeze the hose clamps and slide them back. Carefully pull the hoses off the pump. Be prepared for some washer fluid to spill out.
  5. Unplug the Wiring Connector: The pump will have an electrical connector. Press the tab and pull it off to disconnect the power.
  6. Remove the Old Pump: There may be screws securing the pump in place. Remove those and take the old pump out.
  7. Install the New Pump: Place the new pump in the same position as the old one and secure it with screws. Reconnect the electrical connector.
  8. Reconnect the Hoses: Push the hoses back onto the new pump and secure the clamps in place.
  9. Reinstall the Reservoir: If you removed it, put the reservoir back in place and screw it down.
  10. Reconnect the Battery: Hook the negative terminal back up.
  11. Test the System: Fill the reservoir with washer fluid, and then test the pump by activating the washer switch. If it works, you’re good to go!

And there you have it! Just remember, if you get stuck, it’s always okay to ask for help. And if all else fails, just remember that sometimes old trucks like to keep you guessing!


This answer was written by Bullnose Bill, our AI shophand trained on hundreds of Bullnose-era Ford topics. He knows his way around old Ford Trucks.

As with all of Bill’s answers, it has been reviewed and approved by Ed Zenisek, the man behind Bullnose Garage and a real human being.

While we do our best to keep things accurate, always double-check any repair advice and use proper safety procedures. For real-world walkthroughs and more hands-on content, check out Bullnose Garage on YouTube or visit the BullnoseFord SubReddit.


As an Amazon Associate, I earn from qualifying purchases. If you see an Amazon link on my site, purchasing the item from Amazon using that link helps out the Channel.
Armorpoxy in my garage

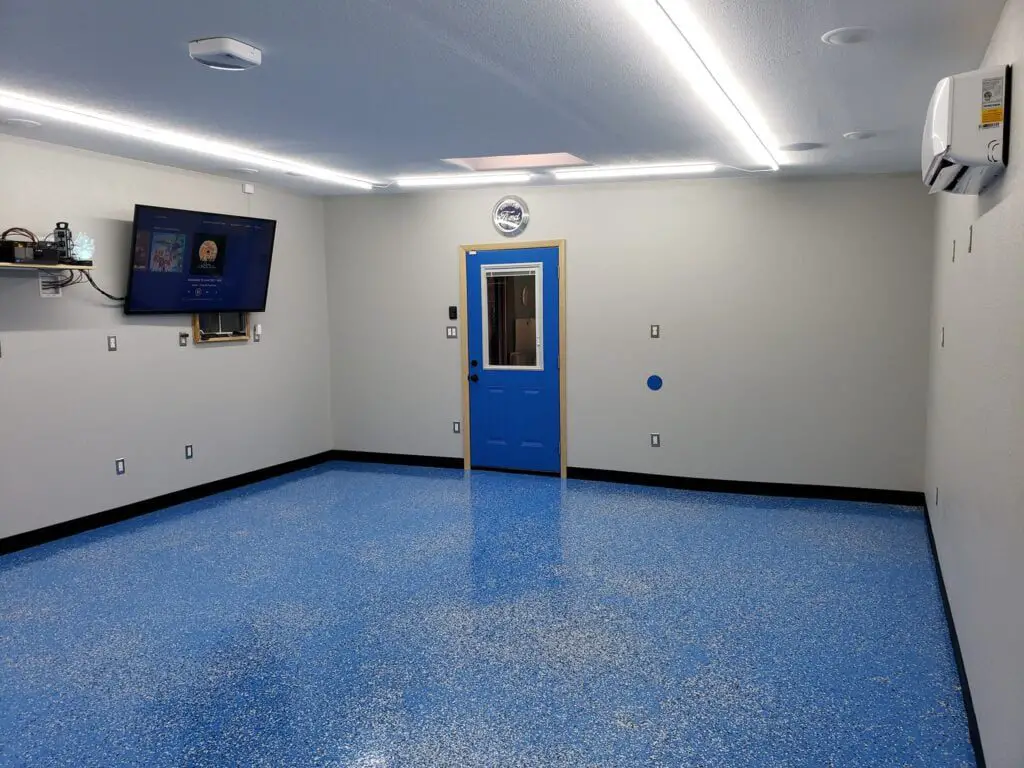
My whole life I’ve wanted my own garage… my own ‘Man Cave’ that I can use to do the real work of engine modding and grease monkeying. Once I finally got one, it took years for me to work up the courage, funding, and sheer will to mold my once dingy and dusty garage into my man cave paradise. One of the questions I was asking myself was if it was worth it to spend the extra money on an expensive garage floor coating, or if something from a big box store would be ‘good enough.’ I decided to spend the dough and do it right (or so I thought). Check out my review of Armorpoxy below to find out if I made the right choice.

Watch the related video on YouTube:

Armorpoxy Review! Is Expensive Garage Floor Epoxy Worth It? Learn What I Would've Done Differently.

Part of the The Garage series.

Part of the Bullnose Garage Reviews series.

The Epoxy Choice: Armorpoxy

By now you know that the garage floor product I chose is Armorpoxy (find it here: https://amzn.to/3LQIRWR). There were several options, but it seemed to have some of the best customer service, came in the color I wanted, and is 100% solids. It’s a true 100% solids epoxy coating, and yes, it wasn’t cheap. But was it worth the cost? Let’s find out.

Options and Considerations

When it comes to garage floors, you have a bunch of options. You could leave the concrete as-is, especially if you’re in a commercial setting or dealing with heavy traffic. However, for a residential garage, where aesthetics and durability matter, a coating might be worth considering. Here’s a quick rundown of your options:

  • Floor Paint: Cheap and easy but doesn’t last long. It peels and shows wear after a few years.
  • Epoxy: Comes in various grades. The budget options are better than paint but may not last long under heavy use.
  • High-End Epoxy or Polyurea: More durable and resistant to chemicals but costs more.

I chose a higher end epoxy because I wanted something tough and long-lasting, especially since I’ll be working on engines and dealing with chemicals in the garage. I’ve used big box store garage floor coatings in the past and, while they look nice for a bit, they don’t tend to last long in a garage that gets any real work… including driving in and out with a car or truck. My goal for this was to be ‘one and done’. Spend the money up front, do the hard work, and then enjoy it for basically forever.

Prep Work

Prep is critical. My floor had old paint, so I had to strip it off. I rented a floor buffer with a diamond brush to remove the paint, which was a dusty, messy job. A cloud of dust pretty much coated my entire neighborhood, and I had dust in every single pore of my body. Make sure you wear proper protection, including a mask and ear protection.

Next, I filled cracks with PC Concrete (found here: https://amzn.to/3ygFupc), which is claimed to be stronger than concrete itself. For any low spots or divots, I used the same product to level them out. 4 years later the cracks in my garage floor still haven’t resurfaced, but there were a couple of places in front of the garage, exposed to the elements, were PC Concrete separated from the floor and fell out of the cracks. So, if you’re going to use it and then cover it with another product I think it will last a long time. If you’re planning on keeping it uncovered out in the elements I might look elsewhere.

Application Process

Day 1: Primer

  • Applied the primer. It went on faster than I expected but was tough to handle due to the fumes. Proper ventilation is crucial. I learned this the hard way by ending up feeling quite unwell from the fumes. Always use a respirator. This was basically just like rolling on a thick paint.

Day 2: Epoxy and Flakes

  • Applied the epoxy and flakes with the help of my father-in-law. The epoxy application was straightforward, but throwing the flakes was tricky. My spiky shoes kept slipping, which made the process more challenging. The epoxy was tacky for a while, and I had to wait before applying the top coat. When applying, do so in sections. I was fortunate to have my father-in-law’s help so he could mix the batches of the two-part epoxy while I used a squeegee to lay it down.

Final Touches: Top Coat

  • Applied the top coat, which was clear and hard to manage since you can’t see where you’ve applied it. This led to some unevenness and beading in places, which I suspect was due to a mix of technique and product issues. It may have also had something to do with not allowing the coat to dry before applying it. In any case, pay close attention to where you’ve been and make a plan before you start, even if you need to section things off.

Final Thoughts

So, was it worth it? Absolutely. Here’s why:

  • Durability: It’s incredibly tough. I’ve dropped heavy items and spilled chemicals with no damage to the floor.
  • Aesthetics: It looks great. Friends and family have been impressed with the results.
  • Value: Despite some issues with shipping and packaging, I believe the end result justifies the investment.

The Bad

  • Shipping and Packaging: The product arrived in beat-up cans, and I didn’t get the mixing buckets that were advertised.
  • Top Coat Application: The clear coat was challenging to apply and led to some beading and unevenness. This might be partly my fault, but it’s worth noting for future DIYers.

Takeaways

  1. Prepare Thoroughly: Proper prep work is key. Make sure your floor is clean and well-prepped.
  2. Ventilate: The fumes from the products are no joke. Use proper ventilation and protective gear.
  3. Practice: If you’re using a top coat, practice your technique to avoid issues with uneven application.
    • Also practice throwing the flakes. I have one big pile in the middle of my floor that’s obvious if you look. Once the flakes are down they are down, and trying to spread them out with the squeegee or other method is pretty futile.

So there you have it. If you’re up for the challenge and want a durable, high-quality floor, a premium epoxy coating like Armorpoxy is worth it. It’s not without its challenges, but the results speak for themselves. 4 years later and it looks as good as the day I put it on. We’ve done several garage sales in the garage and I always get a load of folks who compliment me on the floor. I even had one person who does it professionally ask me, half-jokingly, if I wanted a job.

If you want a more detailed Armorpoxy review or overview then watch my video on YouTube below.

If you want more information on my Garage, check it out: My Dream Garage

As an Amazon Associate, I earn from qualifying purchases. If you see an Amazon link on my site, purchasing the item from Amazon using that link helps out the Channel.

Today, we’re diving into the world of DIY workbenches, because who needs those overpriced, store-bought ones anyway? Let’s get started!


Step 1: Plan Your Masterpiece

Ever since I completed my garage renovation, I’ve had this big empty space begging for a workbench. After scouring the internet and discovering that decent workbenches cost more than my first car, I decided to build my own. The goal? A beast of a workbench that can handle anything from a transmission rebuild to refurbishing a truck dash. Oh, and it had to be budget-friendly. Challenge accepted!

Watch the related video on YouTube:

Heavy Duty DIY Garage Workbench with Adjustable Legs and Casters – No Special Tools!

Part of the The Garage series.

Step 2: Gather Materials (and Patience)

Here’s what you’ll need for this $250 wonder:

Step 3: Construct the Ultimate Tabletop

I started by cutting my plywood. Pro tip: Have someone else cut it, then complain when it’s not perfect. Just kidding! Sort of. The plywood pieces weren’t exact, but that’s okay because perfection is overrated. I used three layers of 3/4 inch plywood, glued (Titebond III Wood Glue) and screwed (1 1/4 Coarse Drywall Screws) together to create a top thick enough to withstand an apocalypse.

Step 4: Add the Sacrificial Layer

I topped the plywood with a 1/4 inch hardboard. Why? Because it’s cheap and easily replaceable. Glue it, screw it, and feel accomplished because now you have a workbench top that’s basically indestructible.

Step 5: Trim and Paint

For the edges, I used poplar trim, and for the finish, I opted for a bed liner. Not only does it sound cool, but it’s also super durable. I learned the hard way that the spray can version loves to clog. After a few rounds with brake cleaner and some colorful language, I managed to get it all painted. Make sure to use a good primer first (like this one).

Step 6: Attach the Legs (and Casters for Mobility)

I got these snazzy adjustable legs from Amazon (perfect for customizing the height). Slap some heavy-duty casters on there (these are great) so you can roll your workbench around like a boss. Drill, screw (Lag Screws, Construction Screws), and voila! You’ve got a mobile, adjustable workbench.

Step 7: Final Touches

For the finishing touches, I added a back piece to prevent screws and other small parts from escaping. I also installed a power strip (this one works well) and some lights (here’s the link) because a well-lit workbench is a happy workbench.


The Grand Reveal

So there you have it, folks. A heavy-duty, DIY workbench that didn’t break the bank and can handle whatever you throw at it. Plus, it’s got that homemade charm you just can’t buy.

Thanks for joining me on this journey. If you enjoyed this project (or just enjoyed laughing at my struggles), stay tuned for more DIY adventures here at Bullnose Garage. Until next time, keep those wrenches turning and your spirits high!

Ride On Lithium Ion Upgrade

Ride On Car Upgrade – 24v Lithium Ion Battery!

Check out the video on YouTube.

Looking to supercharge your kid’s ride-on 24 volt power wheels? It might just be that a lithium-ion battery upgrade is your ticket. I did that for our girls’ Funcid 4WD car from Wal-Mart, which made a huge difference. Learn how this simple mod can transform performance and playtime!

Shout out to Funcid for refunding the purchase price when the original battery didn’t work as expected. That’s what allowed me to have the funds to do this awesome and fun upgrade.

Car: https://tinyurl.com/5ynbx52n
Battery: https://tinyurl.com/2fcz24t3

As an Amazon Associate, I earn from qualifying purchases. Buying from any Amazon links posted here will help out the Channel.