Show Transcript
Ever been sitting at a stoplight in your seemingly mild manner V8 when some joker in a new fangled chrome plated Bluetooth infested tow mirror flexing pavement princess of over compensation pulls up and grins like he knows what’s up? You ever want to smoke that guy? Ever want to make him tinkle just a little before you do? Then you, my friend, need some cutouts.
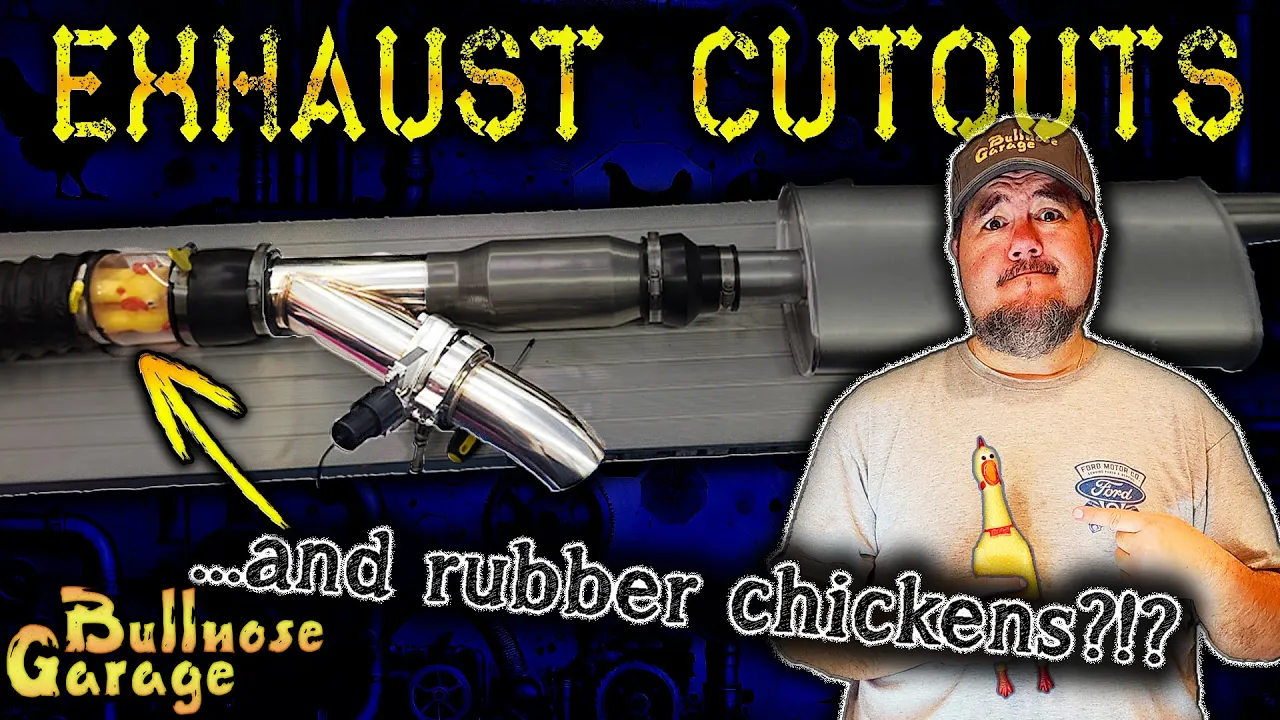
Howdy folks, Ed here. Welcome back to Bullnose Garage, and if you’ve never heard of exhaust cutouts before, stick around because I’m about to use my new chicken chamber here to show you how these nifty devices can let you switch your exhaust note on a dime. And hey, big shout out to Dynox for sending me two 3-inch electric exhaust cutouts to play with before I hook them up to my upcoming 408 stroker build.
Now, before we get these out of my truck, we’re going to do some bench testing. And yes, that means I’m putting my homemade chicken chamber into action. Hello! All right, so let’s start with the basics. What the heck is an exhaust cutout? Well, in simple terms, it’s a controlled bypass valve that lets your exhaust gases take a short shortcut, bypassing your mufflers and catalytic converter when you want maximum volume and minimal restriction. When closed, your truck sounds normal. Hit the switch, instant unfiltered straight pipe chaos.
Now, cutouts are nothing new. Hot rodders have been messing with them for decades. Back in the early muscle car days, guys would literally unbolt sections of their exhaust at the track to let the engine breathe better. Before that, there were even factory exhaust bypass systems on some very old performance cars, but they were usually vacuum or manually operated. These days, thankfully, we’ve got electric cutouts with remotes, meaning you don’t even have to leave the driver’s seat to uncork the beast.
And this right here, this is a 3-inch electric cutout, meaning it runs off 12-volt power and uses a butterfly valve to open and close. It’s got a wireless remote, which is a hell of a lot better than crawling under your truck with a wrench like they used to do back in the day.
So let’s break down the mechanics. Inside this cutout is a butterfly valve, the same basic idea as using your throttle body. It’s a metal plate that rotates on a central shaft. When closed, it seals against the housing—well, mostly. More on that later. And when you hit the switch, a small electric motor turns the shaft, opening the valve and giving your exhaust gases a shortcut to freedom.
Now, here’s the thing: placement matters. If your goal is to commit the audio equivalent of a war crime and turn your neighbors into bitter husks hellbent on evicting you from their lives, then yeah, go ahead and slap that cutout before the catalytic converter. Open it up, and you’re basically running headers. It’s going to be loud, raw, and depending on your local laws, probably a little illegal. But if you actually like your neighbors and at least want to keep peace, then placing the cutout after the cat but before the muffler is usually the way to go. You’ll still get a deep aggressive tone just like you don’t have a muffler on it, but it won’t be quite as ear-splitting as open headers would be.
Now, if you wonder what the actual difference is, it comes down to two very different experiences. Putting the cutout before the catalytic converter means you’ll get the maximum noise with no restriction and zero filtration. If you want your truck to be as loud and free as possible, this is the way to do it. Like I said, it’s loud, raw, and will make your neighbors question their life choices. It may also give you a negligible horsepower boost and less back pressure depending on what cats you’re running.
On the other hand, placing the cutout after the cat gives you what I call controlled aggression. You’ll still bypass the muffler, so you get a deep aggressive rumble, but the cat will take a little bit of the edge off, just enough to make it slightly less of a ‘sir, we need to have a talk’ moment when a cop pulls up behind you. You’re still running cats this way, though, so any restriction that they introduce will still be part of the system when you open these up.
For this demonstration, I’ve got my cutout placed before the cat so we can actually hear the difference when we flip the switch. But trust me, if you put one of these before the cat, you’re basically summoning demons every time you hit the gas. If you’re putting one of these in, though, it’s very probably what you’re going for anyway, so far be it for me to tell you your business.
Now, obviously, my shop vac exhaust stimulator isn’t putting out the same kind of flow as my 408 stroker will, but it still gives us a great way to visualize how the cutout works and, more importantly, how airflow and sound change when we flip the switch.
Now let’s talk real-world pros and cons of running electric cutouts because while they might seem like the perfect solution to all your exhaust tone problems, they do come with their own set of tradeoffs. First off, the pros. I mean, the biggest one is obviously instant volume control. You’re literally flipping a switch to go from quiet and respectable to full-blown hooligan mode in an instant. And there’s also a potential performance gain at high RPM since a free or flowing exhaust can reduce back pressure, though whether that translates into actual measurable horsepower really depends on your system.
And let’s be real, half the fun of having cutouts isn’t about the power; it’s about the sheer joy of knowing you can unleash absolute chaos whenever you feel like it. You’re not stuck choosing between stock sound and straight pipes; you get both. That’s the kind of flexibility that makes these things a lot of fun and so appealing.
But of course, as with most things, it’s not all sunshine and horsepower. The first major downside: they all leak eventually. It’s not a matter of if, but a matter of when. Over time, heat cycles cause expansion and contraction, carbon builds up around the valve, and sooner or later, you’ll start hearing a faint ticking or hissing sound when the valve is supposed to be shut. Now, for some people, that’s not a big deal, and for others, especially if you’re trying to keep things quiet when the cutout is closed, it can be a deal breaker, especially if this is going in your daily driver.
This is really the main issue. These butterfly valves don’t always seal perfectly, and over time, they can start to let little leaks develop. Is that the end of the world? No, but it’s something to be aware of. Routine maintenance goes a long way in keeping them from turning into an annoying rattle factory. Just a quick blast of carb cleaner now and then can help keep the buildup under control. It’s not rocket science; just part of keeping your exhaust system happy and working the way you want it to. If you never clean the valve, carbon buildup could start making it harder to close all the way or even jam it up completely. This is why it’s a good idea to cycle the valve open and closed every now and then, even if you don’t plan on using it every day, like maybe every time you start it up in your driveway or something. I mean, depending on your neighbors, letting it sit in one position for months just lets grime settle in.
And let’s not forget about the motor itself. It’s exposed to dirt, moisture, and road grime, all of which can shorten its lifespan if you’re not careful. A little dielectric grease on the connectors and some basic shielding can go a long way in keeping it working properly. And of course, there’s the big elephant in the room: legality. Depending on where you live, opening that valve on a public road might be technically illegal, especially if you’re bypassing emissions equipment or violating noise ordinances. Some areas are more lenient than others, and let’s be honest, plenty of people run these things without ever having an issue. But if your town has a Karen who dials the cops every time she hears a leaf blower, you might want to keep that in mind before installing one.
Also, as a personal request from me, the old man of Bullnose Garage, respect your communities and don’t open these up in residential areas at night, guys. Be a good steward of your horsepower. This has been a public service announcement from Bullnose Garage.
All right, let’s fire this thing up and see what happens. And away we go! All right, guys, forgive my janky setup here in my messy workbench. I’ve been doing a lot of stuff in here, so anyway, you can see I got things just kind of hooked up through a couple of testing leads to a homemade 12-volt plug that goes to my bench tester, and that runs to the cord. And there’s the control box to the Dynox cutout over here. So in my grubby little paws, I have the remote control, and it’s pretty easy. You just hit the unlock button, and you can see the motor turns this shaft right here, which turns the butterfly valve on the inside. I’ll show you that in a minute, and it’s just like that—super, super simple.
So let me get you down here so you can see the butterfly valve in action. If you can see down inside of there, and I will open it up. There we go, super easy and simple.
All right, guys, now let’s see this action with the chicken chamber. We are going to see if opening this cutout makes those chickens any louder. Now keep in mind that this is a demonstration in my garage with a shop vac and some rubber chickens, so it may not make that much of a difference, but this is the first time I’ve done it, so I’m really curious to see. Okay, here we go. Let’s start our engines. All right, I’m going to open her up. That’s incredible! Listen to that—close, open, close. You can actually hear a difference.
Well, guys, bad news: it overheated and I blew my head gasket. All right, head gasket replaced, good to go. All right, so here’s a little experiment I set up to measure the actual airflow through the system. I’ve got an anemometer here to check how fast the air is moving, kind of like a wind speed gauge, but for our exhaust setup. First, we’re measuring airflow coming out of the muffler with the cutout completely closed. You can see it’s reading right about 12.3 mph, which isn’t too bad considering it’s a shop vac and it’s all being forced through the muffler’s internal baffles.
Now for the second test, I’ve blocked off the muffler entirely, forcing all the air to exit through the cutout. You think this would be the most direct path, right? But check this out: we’re only seeing about 9.5 mph of airflow. And finally, with the muffler unblocked and the cutout wide open, we’re getting around 5.3 mph to the cutout. So what’s going on here? At first, you’d expect the cutout to flow more because it’s basically a straight pipe with a flap, but airflow isn’t just about having an open hole; it’s about how efficiently the air can move through the system.
When we block the muffler, even though all the air had to go through the cutout, the design of the cutout itself, like the butterfly valve, the angle of a T-junction, and the turbulence around the edges created more restriction than I thought. The air doesn’t like making sharp turns, and even with the valve fully open, the flap and the shaft are still in the way, causing turbulence that slows things down. Now, with both the muffler and the cutout open, the airflow has two escape routes, so it splits between them. So while the cutouts give you that aggressive sound and reduced back pressure, under real driving conditions, they’re not a magical free flow hack. Airflow dynamics are a bit more complicated than that. Still, the sound difference? Oh yeah, that’s where the cutout really shines.
Also, keep in mind this is me goofing out of my garage with a shop vac and some rubber chickens. As you can see, the exhaust path is also a completely straight line, and the cutout is right before the cat, which is right before the muffler, and it’s a dryer vent, and there’s all kinds of stuff going on here. So real-world stuff is absolutely going to be different than this, but I still thought this was a really, really neat experiment.
Now, like I said, this setup is obviously not moving as much air as a real V8, but it’s a fun way to demonstrate how exhaust routing changes sound and flow when you bypass your muffler.
All right, guys, let’s take a quick look at just what comes in the box with this 3-inch Dynox cutout. Captain, you got your instruction manual here. It’s pretty simple; it just kind of tells you about the parts and pieces that all come in here. We’ve got our gaskets. Here’s our control module with our remotes, which is super handy. You can also wire these up to be switch operated, which is what I’m going to do when I do mine. I’m not a fan of the remote; I’d rather have a switch on the dash. It’s a little bit more positive for me—just got to flick it, and it comes on. I think that’s kind of neat, but the remotes are pretty cool if you don’t have to worry about wiring up a switch. I don’t mind doing that, so I’m going to do it the hard way. But yeah, that’s pretty cool.
This is the actual butterfly valve, which opens and closes. I will open that up and show you a little bit more about that in just a minute. This is the clamp that goes between the end of the exhaust port here and the rest of the cutout. Obviously, your bolts to clamp everything together and the flange, which is what meets with this part to this part here. And then this connects up to your butterfly valve and the rest of the cutout. And then obviously, this is the meat and potatoes here, which is the actual cutout pipe itself—again, 3 inches of stainless steel glory.
So that is what comes in the box. It’s actually real simple—not a lot of complicated pieces. The remotes make it pretty easy to use, so things never go back in the box the way they came out, which is absolutely typical for all this kind of stuff.
All right, so let’s talk a little bit about this guy here. This is your butterfly valve, and this is what does all the dirty work for these cutouts. It’s what opens up and closes. It’s also the part that’s going to cause you grief down the line when it gets clogged up with carbon or other bits and pieces, or this motor gets crammed up with gunk. Now, if you look at this unit here, you can see this is a rubberized coating on this motor. It’s actually like a little rubber boot that goes on here. Actually, I think I can probably pull it off and show you what’s going on inside of there. Yeah, yeah, pretty simple—just a simple motor there. It’s got that rubber boot on it, which is nice because that’ll help keep the elements out. I think when I install these on mine, I’m going to actually add even a little bit more protection to this than what’s already on here, just to keep it clean and free of gunk and debris.
So yeah, it’s pretty simple. Here you can see the sealing surface on either side, and it just plugs right into the control box. Let me take this off of my other one here. I already got it hooked up with a remote. I will plug that in, and let’s see if my remote works. There we go, pretty simple. Actually, the neat thing with these is that you can have it partially open or partially closed; you just have to make sure that you finish closing or finish opening it. Nothing complicated about that; it’s pretty simple. The trick with these is when you close them, make sure you close them all the way because if you just barely close them, it’s like right there. Okay, so there’s open, there’s closed, and I didn’t really close it all the way. It’s not completely sealed. If you hold it a little bit longer, that little bit around at the end that closes it and seals it up pretty nice. But again, it’s really just a matter of time before this guy ends up not sealing completely just because of carbon buildup and stuff around the edges, right? So you just want to make sure that every now and then you spray some carb cleaner here on this part. Now, it’ll be a little bit tougher once you’ve got the flange on the end here, but you can still get up in there pretty easy. Just crawl up underneath the vehicle and spray some carb cleaner in there a few times just to make sure that it operates smoothly, and that will help. It will give you a little bit more life out of it before it starts to make a bunch of noise. But I really do think, no matter what quality of these things you buy, you’re going to end up getting some leaks eventually. That’s just the nature of the beast. So luckily with these units, they are real easy to disassemble, unbolt, and just swap a new one in if that does happen.
So yeah, there it is. So that’s exhaust cutouts in a nutshell, or in this case, a peanut butter jar full of screaming chickens. You know, big thanks to Dynox for sending me these. I’ll be installing these on my 408 Joker build soon, and we’ll see how they sound in a real-world test. If you’re interested in adding cutouts to your own ride, I will drop a link to these below. You guys, if you like this video, if you like screaming chickens or the thought of making some schmo in his chrome plated pickup tinkle in his undies, hit like, subscribe, and let me know in the comments. Would you ever run cutouts on your setup, or are you the kind of guy who prefers a muffler that actually muffles? As always, if you have any questions, comments, concerns, gripes, internet ramblings, stick them below. And thanks again so much for watching, guys. We will see you next time. She’s rough around the edges, but she’s doing fine, tinkering away, getting things to shine. And oh no, she’s considered divine. Thanks again for watching. We will see you next time. Thanks again for watching. We will see you next time.
Welcome back to Bullnose Garage, where the only thing more questionable than my sense of humor is my choice of testing equipment. Today, we’re bench-testing a pair of DynoVox 3-inch electric exhaust cutouts with a setup that includes a shop vac, a high-flow cat, a muffler, and—wait for it—a peanut butter jar full of rubber chickens. Yeah, you read that right.
What Are Exhaust Cutouts?
If you’ve ever wanted to switch your exhaust note from polite conversation to full-on rock concert with the flip of a switch, exhaust cutouts are your jam. These nifty devices act as controlled bypass valves, allowing exhaust gases to detour around your mufflers and catalytic converter for maximum volume and minimal restriction. Think of it as an instant audio upgrade for your ride.
A Brief History
Exhaust cutouts aren’t exactly new. Back in the muscle car days, folks would literally unbolt sections of their exhaust at the track for better engine breathing. Before that, some factory performance cars had vacuum or manually operated exhaust bypass systems. Thankfully, we’ve evolved to electric cutouts with remotes, so you don’t have to crawl under your vehicle with a wrench anymore.
The Mechanics of Electric Cutouts
Inside the DynoVox cutout, you’ll find a butterfly valve, much like what you’d see in a throttle body. This valve is controlled by a small electric motor, and when you hit the switch, the motor turns the shaft to open or close the valve. It’s a simple concept, but one that comes with its own set of mechanical quirks.
Placement is Key
Where you install your cutouts matters. Slap them before the catalytic converter, and you’re essentially running headers—loud and raw. But if you like your neighbors, consider placing them after the cat but before the muffler for a less aggressive tone. This “controlled aggression” still gives you a deep rumble without waking the dead.
Real-World Testing: Shop Vac Style
To simulate airflow and sound changes, I rigged up my chicken chamber. While a shop vac isn’t quite a 408 stroker, it provides a fun way to visualize how these cutouts work. With the cutout open, the airflow splits between the muffler and cutout, and surprisingly, it’s not always as free-flowing as you’d expect. Turns out, airflow dynamics are a bit more complicated than just opening a flap.
Pros and Cons
Pros:
- Instant volume control with a switch.
- Potential for reduced back pressure and slight performance gains at high RPMs.
Cons:
- Butterfly valves eventually leak due to heat cycles and carbon buildup.
- Legal considerations—some areas frown upon bypassing emissions equipment.
The Setup and Results
Using my trusty shop vac and anemometer, I measured airflow with the cutout fully closed, fully open, and in various configurations. The results were eye-opening. Even with the cutout open, the design creates some airflow restriction due to turbulence around the butterfly valve. So, while it’s a blast to hit the open road with these, don’t expect them to turn your ride into a race car overnight.
What’s in the Box?
The DynoVox 3-inch cutout kit comes with a control module, remotes, gaskets, and the cutout itself. It’s simple to set up, and you can even wire it for switch operation if remotes aren’t your thing. Just remember that routine maintenance is key to avoiding leaks and ensuring longevity.
Wrap-Up
There you have it—a crash course in exhaust cutouts, complete with rubber chickens. Big thanks to DynoVox for sending these over. I’ll be installing them on my 408 stroker soon, so stay tuned for that real-world test. Meanwhile, let me know if you’re a cutout fanatic or prefer your mufflers to actually muffle. Drop your thoughts in the comments below and, as always, thanks for tuning in.
Check out the video for all the squawking chicken fun and let me know what you think!

If you want more specific information on Bullnose Ford Trucks, check out my YouTube Channel!
For more information on Bullnose Fords, you can check out the BullnoseFord SubReddit or Gary’s Garagemahal. Both are excellent resources.
As an Amazon Associate, I earn from qualifying purchases. If you see an Amazon link on my site, purchasing the item from Amazon using that link helps out the Channel.