Tag rust prevention

How prone are 1980-1986 Ford Bullnose trucks to rusting?


Bullnose Bill explaining rust issues in Ford Bullnose trucks from 1980-1986.

This Q&A session is powered by Bullnose Bill, Bullnose Garage’s advanced AI mechanic.
Have your own question? Ask Bill!

Bill says:

Ah, the age-old question of rust! Like many classic vehicles, Bullnose Fords are certainly prone to rust, especially if they’ve been exposed to harsh weather conditions or road salt over the years. The key areas to watch for rust include:

  1. Wheel Wells: These can trap moisture and dirt, leading to rust development.
  2. Cab Corners and Rocker Panels: These areas are notorious for rust due to their proximity to the road and water spray.
  3. Frame: While the frame is generally sturdy, it can still develop rust, especially if the truck has been driven in wet conditions without proper care.
  4. Bed: The bed can also be susceptible, especially if it has been used for hauling materials that retain moisture.

To combat rust, regular maintenance is crucial. Here are a few tips:

  • Wash Your Truck: Regularly wash the underside, especially during winter months to remove salt and grime.
  • Inspect and Repair: Keep an eye on vulnerable areas and address any rust spots early. A little preventative work can save you a lot of headaches later.
  • Rustproofing: Consider using a rustproofing treatment if you live in an area where rust is a concern.

It’s all about keeping an eye out and being proactive! And if you’re looking for more insights or some DIY fixes, the Bullnose Garage YouTube channel has some excellent tips on rust repair that you might find helpful. Happy wrenching!


User avatar
User:

Is surface rust a concern for my Ford Bullnose truck?

Bill avatar
Bill:

Surface rust is definitely something to keep an eye on, but it’s not always a cause for alarm! If you catch it early, you can often address it before it becomes a bigger issue. Here are a few key points about surface rust on your Bullnose:

What to Look For

  • Appearance: Surface rust usually appears as light discoloration or patches of rust on the metal. If it’s just a small spot, you might not need to panic.
  • Location: Check common areas like the fenders, the bed, and the frame. If it’s on a non-structural part, you have a bit more leeway.

Should You Worry?

  • Yes, but gently: While surface rust can often be treated without major repairs, ignoring it can lead to deeper rust issues. If it spreads, it could compromise the integrity of the metal.
  • Rust Prevention: If you see it, clean it up before it gets worse. You can use sandpaper or a wire brush to remove the rust, then apply primer and paint to protect the bare metal.

Remedies

  • DIY Fixes: If you’re comfortable, you can handle these small fixes yourself. It’s a great project to tackle on a weekend! Just grab some supplies from your local auto parts store.
  • Professional Help: If the rust has spread a bit more than you’d like or you’re not sure about your skills, it’s always a good idea to consult with a professional.

Remember, keeping your Bullnose looking its best is part of the fun! Plus, it’ll help maintain that classic charm. If you’re ever unsure, you can always check out resources like the Bullnose Garage YouTube channel for more hands-on advice. Happy truckin’!


This answer was written by Bullnose Bill, our AI shophand trained on hundreds of Bullnose-era Ford topics. He knows his way around old Ford Trucks.

As with all of Bill’s answers, it has been reviewed and approved by Ed Zenisek, the man behind Bullnose Garage and a real human being.

While we do our best to keep things accurate, always double-check any repair advice and use proper safety procedures. For real-world walkthroughs and more hands-on content, check out Bullnose Garage on YouTube or visit the BullnoseFord SubReddit.


As an Amazon Associate, I earn from qualifying purchases. If you see an Amazon link on my site, purchasing the item from Amazon using that link helps out the Channel.
Buffing Old Paint

Published on July 11, 2024

Click to play the video inline  or  see it on YouTube

Part of the The Bullnose F-150 series.

Want to see more like this? Subscribe to Bullnose Garage!

Show Transcript

Hey guys, just thought I’d give you a real quick update on the condition of the truck and, uh, kind of how things are holding up after a few years. Uh, I still try to drive it every, uh, now probably about once or twice a month. Um, sometimes I drive it two or three times or five times a week just because my other truck’s in service or something else. So, uh, but yeah, it gets a fair bit of use and, uh, you know, it does pretty well.

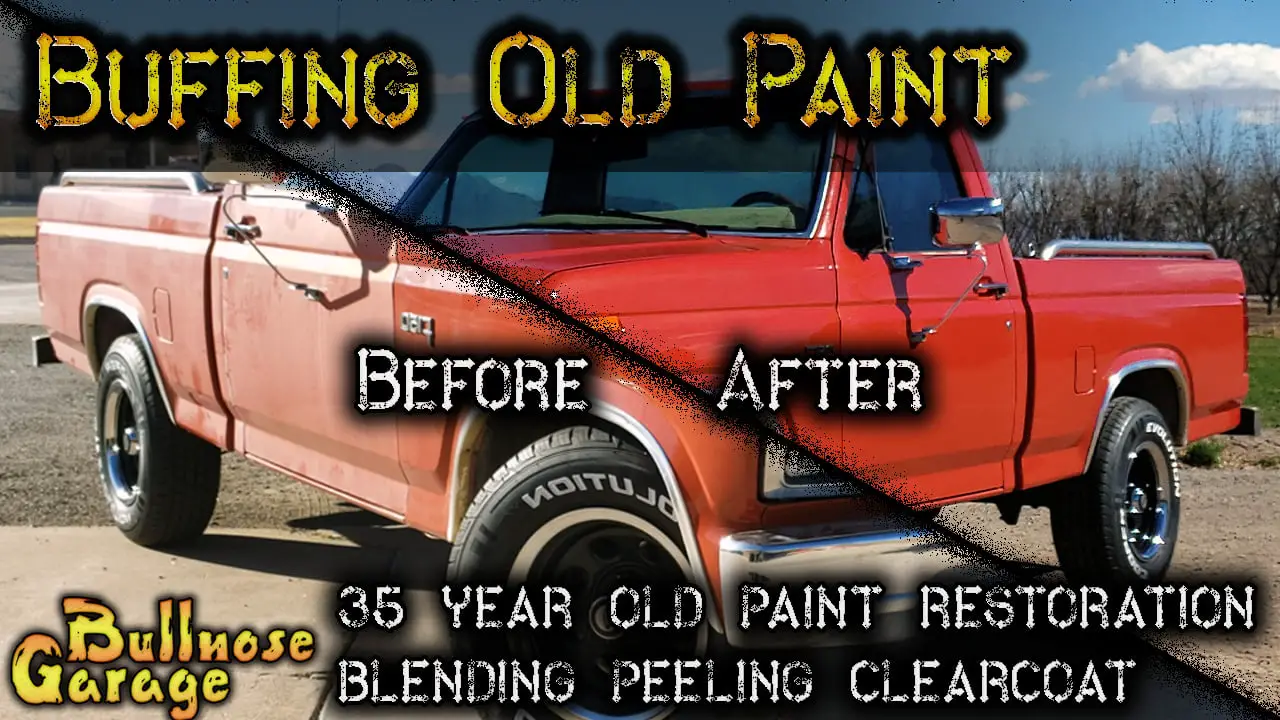
So I just kind of wanted to, you know, it’s been about three years since I’ve done any real video work on it. Um, things like the bus in paint or, yeah, the buff job that I did and the, uh, uh, the white on the tires. Thought I’d just kind of give you an update as to how the stuff looks. So take a look. Hello.

All right, so let’s start with the wheels and the tires, specifically the white on the tires. Now, I don’t know if you guys saw my previous video where I actually did this with a white paint pen. Uh, I actually tried some white actual paint, but it didn’t work out very well. Uh, the paint pens seem to work the best. And so I’ll just go around and give you guys, uh, a quick tour. Now it’s been about, uh, two and a half or three years since I did that work to it and, uh, you should note that I haven’t really washed it in that time. Uh, this is a once or twice a month driver basically and, uh, I haven’t gone through any car washes. I haven’t done any tire cleaning, anything like that. Um, so basically just, uh, having it sit out in the elements. Now it is here in New Mexico, so there’s a lot of UV, um, a lot of really hot days. Uh, and you can see where, you know, like, like right in there in the r, there’s some spots and an O where the paint’s kind of coming out. But, you know, um, I think it actually looks really good for being three years old. I still have the paint pens in the garage. It wouldn’t take me very long to touch this up. Um, I’m actually really happy with how well it’s held up over the course of the last few years. So yeah, I think it looks really, really nice. Again, I’ll go over the other side and kind of show you them. This is the side that kind of gets more sun generally throughout the year. I started out putting, uh, wheel and tire covers on it, but I stopped doing that ’cause it’s just kind of a pain. So, but yeah, I mean, there’s a nice kind of closeup look. I mean, when you get real close, it looks ugly, right? But if you’re far enough away, like, you know, you’re with me driving on the road, it looks pretty good, you know, especially against those black tires with black rims. I mean, it looks nice this far away. So yeah, pretty happy with that, pretty happy with how well it’s worn up, uh, hold up, held up. BL.

Now, like I said, I haven’t done a lot of washing, so I don’t know what this would be like if I, if I’d gone through automatic car washes or, uh, done a lot of, uh, wheel and tire cleaning over the last few years. But, um, again, just sitting there kind of out in the sun every day, I think it’s, uh, pretty good.

All right, and now for the obvious update, which is the paint. Uh, you can see that there’s quite a bit more flaking going on now than there was. Um, I actually had a, I hate myself sometimes, I actually had a toolbox roll down the driveway and scrape against this right there. Um, you know, sometimes that happens, you’re not paying attention. It’s a, not really, but you know, but you can see that, you know, there’s some more flaking going on there and, uh, you know, some thinking going on there, a little bit of, uh, rust type stuff coming through there. Um, yeah, so the, the, uh, the buffing that I did with the, uh, trying to, yeah, you can, oh, here is, here’s a good, you can see where I, I had the, the buff go to before and now where the, the clear coat is continuing to flake away even more than it was before. You know, that’s just time, guys. This clear coat is just, it’s at the end of its life and, uh, there’s not much you can do about that, you know, except for sand it all down and repaint it. So the buffing gave me a few good months of it looking nice, um, and then it kind of went back to, to the way that it was. So, um, and this stuff back here is, is back to being really dull. It would not take much to, to sort of re-bring this out, but again, you can see here where this is actually some paint degradation here. So, uh, yeah, but as I’ve said several times, repainting this truck is in the cards, so I’m, I’m not too worried about it. It’s, it’s interesting to see the result after a few years of, uh, basically neglect. I, I don’t, I take care of the truck mechanically. I don’t really wash it very often. Um, it’s kind of a, uh, you know, backup vehicle for us right now. So once I get a nice new paint job on there, I mean, I’m, I’ll take care of that and keep it in the garage, but I’m, I’m not in that point yet. So yeah, I mean, that’s what it looks like after being out in the elements for, for three years.

All right, well there you go, guys. There’s the, uh, condition update on the Bullnose. Um, it’s again mechanically, it’s in great shape. Uh, visually it’s seen better days, but it’s not too bad, I think, considering its age and, and my lack of care over the course of the last couple years, visually anyway. Uh, you know, but I think the, the, uh, the tire lettering is a real win. Um, the buffing was a win for a while and it didn’t take very long for that to, uh, sort of go back to the way that it was before. But again, um, I learned a lot from that experience. If you guys haven’t seen those videos, go check them out, uh, where I, I, I sort of buff and shine this, this truck up and make it look way, way nicer. It was real nice for a couple of months and, um, again where I, uh, the video where I do the, the tire lettering, uh, it’s super simple to do. It takes a while ’cause it’s, it’s a pain to sit down and, and outline all the letters with pen, but, uh, I think, I think that the result is worth it. Um, so I would definitely do it again. As a matter of fact, I will probably go back and do these again at some point, uh, when I clean the truck up again, you know, at some point in the next five or ten years. Uh, yeah, so all right, uh, thanks again for watching, guys. We will see you next time.

Welcome back to Bullnose Garage! Today, we’re diving into a reality check with my trusty 1985 Ford F-150 Bullnose. It’s been about three years since I last gave it a good buff and painted those tire letters. How have they held up under the relentless New Mexico sun? Let’s find out.

Tire Lettering: Still Looking Sharp?

First up, let’s talk about the tire lettering. If you remember, I used a white paint pen to give those tires a bit of personality. It’s been about three years, and I haven’t exactly babied the truck—it’s seen its fair share of the sun without much in the way of tire cleaning or car washes.

Surprisingly, the white paint pen has held up pretty well. Sure, there are spots where the paint’s chipped off, especially if you get up close and personal. But from a reasonable distance, it still looks decent. It’s a testament to the durability of those paint pens, especially considering how little maintenance I’ve done.

Paint Condition: The Good, The Bad, and The Flaky

Now, the paint is a different story. The clear coat is flaking more than a croissant at a French bakery. It’s been a gradual process, but the New Mexico sun and my general neglect haven’t done it any favors. I had a little mishap with a toolbox rolling down the driveway and leaving a nice scrape. Sometimes, you just can’t win.

The buff job I did a few years back gave it a temporary facelift, but let’s be real—it was never going to be a long-term solution. The clear coat was already on its last legs. Repainting this truck is definitely in the future game plan.

Lessons Learned and Future Plans

So, what did I learn from all this? First, those paint pens are a win. They’re easy to use and, for the most part, pretty durable. As for the paint, well, sometimes you just have to accept that a full repaint is inevitable. The buffing was a nice stopgap, but it only held up for a few months.

Despite the wear and tear, the Bullnose remains mechanically sound, and I still enjoy the occasional drive. Once it’s repainted, it’ll get the royal treatment and probably see a lot more garage time.

Wrap-Up

So, there you have it—a three-year check-in on my 1985 Ford F-150. The truck’s seen better days visually, but it’s still trucking along. If you’re into classic Ford trucks or DIY projects, this is a good reminder of what to expect over time. Check out the video above for a full rundown, and let me know what you think. Maybe it’ll inspire you to tackle your own project truck.

Thanks for sticking around, and keep those comments coming. I love hearing about your DIY adventures!


Bullnose Garage at YouTube

If you want more specific information on Bullnose Ford Trucks, check out my YouTube Channel!

For more information on Bullnose Fords, you can check out the BullnoseFord SubReddit or Gary’s Garagemahal. Both are excellent resources.

As an Amazon Associate, I earn from qualifying purchases. If you see an Amazon link on my site, purchasing the item from Amazon using that link helps out the Channel.

Published on October 19, 2020

Click to play the video inline  or  see it on YouTube

Part of the Tips & Tricks series.

Want to see more like this? Subscribe to Bullnose Garage!

Show Transcript

Howdy folks, Ed here. Welcome back to Bullnose Garage. If you’ve got an engine that you’re going to have stored for a long time, such as this 351 Windsor that I’ve got here behind me, then one of the things that you need to worry about is the top end getting moisture inside and causing rust, corrosion, or potentially even seizure of the engine.

One of the best ways to prevent that is called fogging the engine, and that’s what we’re going to talk about here today on this Bullnose Garage quick tip. Fogging your engine is a very simple procedure that simply involves taking some oil, typically it’s called fogging oil, and coating the top end components to make sure that water doesn’t get in there and touch those metal parts and cause rust, corrosion, and maybe even seizing of the engine.

If you have a carbureted engine that runs, fogging it is actually really simple. All you’ve got to do is start the engine up, take off the air cleaner, spray some of this down inside for 10 to 20 seconds, or until you see smoke start to come out the exhaust. That’s actually where the term fogging the engine came from, is the smoke that comes out of the exhaust when you do it this way, and that’s going to let you know that this stuff has gone through the entire engine, it’s starting to burn off, and you can shut the engine down at that point so you don’t burn all this off, and you’re pretty much done at that point.

You may want to go ahead and take out the spark plugs and spray some of this down into the spark plug holes for two or three seconds per cylinder, and then at that point you should be good to go.

If you’ve got an engine that’s not running or is fuel injected, then you can’t fog the engine this way. Of course, if it’s not running, you can’t do it that way because it’s not running. If it’s fuel injected, you shouldn’t fog it that way because this stuff can foul up the injectors or cause some sensor issues. So if you have an engine that’s in either one of those situations, the way you’ve got to do it is manually, and I’m going to show you how to do that.

The first thing you’re going to want to do is go and take out all of your spark plugs. So once all the spark plugs are out, then you can go cylinder by cylinder and spray a shot of fogging oil into each cylinder for about three or four seconds.

Now that we’ve taken all the spark plugs out and I’ve sprayed fogging oil down all the cylinders, if I had access to the intake, I’d probably go ahead and spray some down to the intake for two or three seconds to get that part good and coated, and I’d do the same thing for the exhaust if I had access to the exhaust ports. Now, I don’t have access to either one of those in this engine. I’m certainly not going to be taking off the exhaust manifolds or the intake out here, certainly not this evening anyway, so we’re not going to worry about that. The important point is to get this stuff down into the cylinders.

Once you’ve got everything fogged up, you’re going to want to go ahead and turn the engine over manually a few times with a ratchet or a breaker bar to get that stuff in there really circulated around into the pistons, piston rings, the cylinder walls, make sure it’s good and coated. Now, in a Windsor 351, it’s going to be a 15/16 socket, but it could be different depending on your engine. Now, I’m just using a regular ratchet because this engine turns over real easy.

So is fogging your engine really worth the time and trouble to do it? I’ve heard both sides. I’ve heard some folks say that unless the engine is going to sit for years and years and years, it’s really kind of a waste of time. They’ve never seen an engine be rusted out or seized just over a couple of seasons. And other folks say that it’s so easy and simple and cheap to do, why would you not do it? It’s just cheap insurance. Now, I gotta tell you, I’m all for cheap insurance.

Now down here in the southwest, it’s probably not that important because it doesn’t get that humid down here, although during the fall and the spring, there are some pretty big temperature gradients that can cause condensation. But it still wouldn’t be nearly as important as it would be in a more humid area like the coast or down in the south, southeast of the country. The bottom line is that fogging your engine is easy, quick, and cheap, and I am all for easy, quick, and cheap ways to sleep better at night.

As always, if you have any questions, comments, concerns, gripes, internet ramblings, stick them below. Thanks again for watching, and we’ll see you next time.

Hey folks, Ed here from Bullnose Garage. Today, we’re diving into a nifty little trick to keep your engine in top shape when storing it for the long haul. If you’ve got a classic 351 Windsor or any other carbureted engine that’s going to be sitting idle, then you’ll want to stick around to learn about engine fogging. It’s a simple, cheap, and effective way to avoid the nightmare of rust and corrosion.

Why Fogging is a Must for Idle Engines

When an engine sits around without running, particularly through those long winter months, the oil tends to settle down into the pan. This leaves the top end parts like pistons, rings, and valves exposed and vulnerable to moisture. And we all know moisture is the arch-nemesis of metal, leading to rust, corrosion, and potentially, an engine that’s seized tighter than a drum.

Engine fogging is a preventive measure that involves using a specially designed fogging oil to coat these components, creating a barrier against moisture. Think of it as giving your engine a raincoat for those long, non-running seasons.

How to Fog a Carbureted Engine

Let’s break down the process of fogging a carbureted engine that’s still in running condition. First, fire up the engine and remove the air cleaner. Next, spray fogging oil into the carburetor for about 10 to 20 seconds, or until you see smoke billowing out of the exhaust. That smoke is your signal that the oil has made its way through the engine, coating everything it needs to.

Once you’ve got your smoke show, shut the engine down. You can also remove the spark plugs and give each cylinder a quick spray of fogging oil for added protection. A couple of seconds per cylinder will do the trick.

Fogging Non-Running or Fuel-Injected Engines

Now, if your engine isn’t running or it’s fuel injected, the process changes a bit. Running fogging oil through a fuel-injected engine can mess with the injectors and sensors, so we’re going manual. Start by pulling all the spark plugs. Once they’re out, spray some fogging oil into each cylinder for a good three to four seconds.

If you can access the intake and exhaust, give those areas a quick spritz too. But let’s be real, if you’re not up for taking apart your engine, just make sure the cylinders are coated, and you’ll be fine.

Is Fogging Really Worth It?

The big question: is fogging worth your time and effort? Opinions are split. Some folks argue that unless you’re storing the engine long-term, there’s no point. Others say it’s cheap insurance, and why not do it if it’s easy and inexpensive?

In drier climates, like down here in the southwest, it might not be as crucial. However, in more humid areas, fogging can be a lifesaver. With the possibility of condensation forming during temperature changes, it’s a straightforward way to ensure your engine doesn’t turn into a rusty relic.

Conclusion

Fogging your engine is one of those maintenance tasks that’s so simple and cost-effective, it just makes sense. Why take the risk when a few squirts of oil can help you sleep better at night?

As always, if you’ve got questions, comments, or just want to share your own engine adventures, drop a line below. Thanks for tuning in, and until next time, keep those engines running smooth.

Check it out above, and let me know what you think!


Bullnose Garage at YouTube

If you want more specific information on Bullnose Ford Trucks, check out my YouTube Channel!

For more information on Bullnose Fords, you can check out the BullnoseFord SubReddit or Gary’s Garagemahal. Both are excellent resources.

As an Amazon Associate, I earn from qualifying purchases. If you see an Amazon link on my site, purchasing the item from Amazon using that link helps out the Channel.